How to Install an Exhaust Fan in a Bathroom?
Bathroom moisture looks harmless at first. I see the same pattern often. A mirror fogs up. Paint bubbles near the ceiling. The room smells damp after every shower. Then mildew appears in the grout. If we let that moisture stay trapped, it can damage finishes and support mold growth. The U.S. EPA explains that moisture control is one of the most important ways to help prevent mold indoors. You can read their guidance here: EPA Mold Resources.
To install an exhaust fan in a bathroom, I turn off the power, choose the right location, cut the ceiling opening, secure the fan housing, connect ductwork to the outdoors, wire the fan safely, attach the grille, and test the airflow. The most important rule is this: the fan must vent outside, not into an attic, ceiling cavity, or crawl space.
I’m Jason. As an exhaust fan expert and copywriter, I like to make this practical. Below, I’ll walk through the job in a clear way, with the details that matter most.
──────────────────────────────────────────────────
Quick Answer: What Is the Correct Way to Install a Bathroom Exhaust Fan?
The correct way is simple in theory.
But it must be done carefully.
A bathroom exhaust fan should be installed in the ceiling or wall near the main moisture source. The housing must be firmly mounted. The duct must run to an exterior vent cap. The electrical wiring must follow the fan manufacturer’s instructions and local code.
Never exhaust bathroom air into an attic.
ENERGY STAR also states that bathroom fans should be ducted to the outdoors, not into attics or crawlspaces. I recommend reviewing their ventilation guidance here: ENERGY STAR Ventilation Guide.
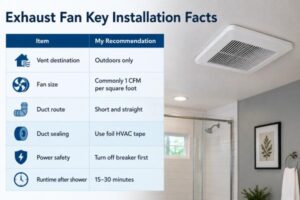
Key Installation Facts
| Item | My Recommendation | Why It Matters |
| Vent destination | Outdoors only | Prevents moving moisture into attic or framing spaces |
| Fan size | Commonly 1 CFM per square foot | Helps remove humid air effectively |
| Duct route | Short and straight | Improves airflow and reduces noise |
| Duct sealing | Use foil HVAC tape | Reduces air leaks |
| Power safety | Turn off breaker first | Prevents electrical shock |
| Runtime after shower | 15–30 minutes | Helps clear lingering humidity |

What Tools and Materials Do I Need?
Before I begin, I gather everything.
A clean setup saves time.
It also reduces mistakes.
You may need:
- Bathroom exhaust fan
- Ductwork
- Exterior wall cap or roof cap
- Drill
- Screwdriver
- Drywall saw or utility knife
- Measuring tape
- Pencil
- Stud finder
- Wire connectors
- Cable clamp
- Foil HVAC tape
- Safety glasses
- Dust mask
- Ladder
- Voltage tester
I also check the product manual.
Every fan is a little different.
Some are fan-only units. Some include lights. Some include heaters or humidity sensors. The more features the fan has, the more important the wiring instructions become.
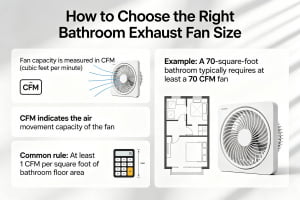
How Do I Choose the Right Bathroom Exhaust Fan Size?
Fan capacity is measured in CFM, or cubic feet per minute.
CFM tells us how much air the fan can move.
A common rule is at least 1 CFM per square foot of bathroom floor area. For example, a 70-square-foot bathroom often needs at least a 70 CFM fan.
The Home Ventilating Institute provides helpful information about ventilation and fan performance here: HVI Consumer Resources.
Here is a simple sizing table I use as a starting point.
| Bathroom Size | Suggested Minimum Fan Size | My Notes |
| 50 sq. ft. | 50 CFM | Good for a small bathroom |
| 70 sq. ft. | 70 CFM | Common for standard baths |
| 100 sq. ft. | 100 CFM | Better for larger bathrooms |
| Over 100 sq. ft. | Add more CFM as needed | Consider fixtures, layout, and duct length |
This is only a practical guide.
Large bathrooms may need more.
Bathrooms with long duct runs may also need stronger fans.
I also pay attention to sound.
Fan noise is rated in sones. Lower sones mean quieter operation. A quiet fan is usually used more often. That matters because an unused fan cannot remove moisture.
──────────────────────────────────────────────────
Step 1: How Do I Turn off the Power Safely?
I always start at the electrical panel.
Not at the wall switch.
I turn off the correct breaker. Then I use a voltage tester to confirm the power is off at the fan or switch wiring.
Do not skip this step.
A bathroom exhaust fan connects to your electrical system. If you are replacing an old fan, there may be hidden wiring inside the housing.
If the wiring looks damaged, old, loose, or confusing, I stop.
Then I call a licensed electrician.
That is the right move.
──────────────────────────────────────────────────
Step 2: Where Should I Place the Bathroom Exhaust Fan?
I place the fan close to the moisture source.
Usually, that means near the shower or bathtub.
The goal is to capture humid air before it spreads across the room.
But I also check what is above the ceiling. I look for:
- Ceiling joists
- Plumbing lines
- Electrical wiring
- HVAC ducts
- Insulation
- A practical duct path to the exterior
A fan should not be placed randomly.
I want a location that allows strong airflow and a short duct run.
Shorter duct runs usually perform better.
Long ducts and sharp bends reduce fan performance. They can also make the fan louder.
──────────────────────────────────────────────────
Step 3: How Do I Cut the Ceiling Opening?
Most fans include a template.
If not, I use the fan housing as the guide.
I hold the housing against the ceiling and trace around it with a pencil. Then I check the location again before cutting.
This is important.
A hole that is too large creates a messy finish.
I cut slowly with a drywall saw or utility knife. I wear safety glasses and a dust mask.
A snug opening is better than an oversized opening.
Once the hole is cut, I test-fit the housing.
If needed, I trim small areas until the fan fits correctly.
──────────────────────────────────────────────────
Step 4: How Do I Mount the Fan Housing?
The fan housing must be secure.
I mount it to a ceiling joist or approved support bracket.
Some fan models come with adjustable mounting rails. Others attach directly to framing.
I follow the manufacturer’s instructions.
Then I check the housing.
It should be:
- Level
- Firm
- Flush with the ceiling surface
- Free from wobble
A loose housing can vibrate.
Vibration causes noise.
Over time, it may also loosen the fan or damage the ceiling finish.
Never rely on drywall alone to support the fan.
Drywall is not a structural support.
──────────────────────────────────────────────────
Step 5: How Do I Connect the Ductwork?
This is where many installations go wrong.
The duct must carry humid air outdoors.
Do not vent into the attic.
Do not vent into a wall cavity.
Do not vent into a crawl space.
The International Residential Code requires local exhaust systems to exhaust to the outdoors. You can view code language through the ICC public code viewer here: ICC Digital Codes – Residential Mechanical Ventilation.
I connect the duct to the fan outlet.
Then I route it to the exterior vent cap.
For best performance, I prefer:
- Short duct runs
- Few bends
- Smooth metal duct when possible
- Properly supported flexible duct if used
- Foil HVAC tape on joints
Flexible duct can work.
But I do not let it sag.
A sagging duct can collect moisture. That can lead to dripping, odors, and poor airflow.
I also check the damper on the fan outlet.
It should open freely.
If the damper sticks, airflow suffers.
──────────────────────────────────────────────────
Step 6: How Do I Install the Exterior Vent Cap?
The exterior vent cap lets humid air leave the house.
It also helps keep weather, pests, and outdoor air from coming back in.
A good vent cap should have:
- A working damper
- Weather protection
- A secure duct connection
- Low airflow restriction
- A proper exterior seal
If I vent through a wall, I cut the wall opening and secure the wall cap.
If I vent through the roof, I use a roof cap designed for exhaust ventilation.
Roof work needs care.
Leaks are expensive.
If you are not comfortable cutting into the roof, I recommend hiring a qualified contractor.
A good fan installation should remove moisture without creating a water leak.
Both things matter.
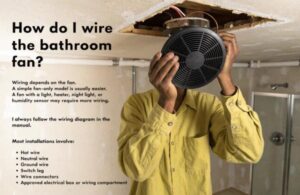
Step 7: How Do I Wire the Bathroom Fan?
Wiring depends on the fan.
A simple fan-only model is usually easier.
A fan with a light, heater, night light, or humidity sensor may require more wiring.
I always follow the wiring diagram in the manual.
Most installations involve:
- Hot wire
- Neutral wire
- Ground wire
- Switch leg
- Wire connectors
- Approved electrical box or wiring compartment
All connections should be inside the approved wiring compartment.
The cable should be secured with a proper clamp.
The ground wire must be connected.
Grounding is a safety step, not an optional detail.
Bathrooms can have special electrical requirements. The National Electrical Code is developed by NFPA. You can access NFPA information here: NFPA 70 National Electrical Code.
If you are unsure about the wiring, call an electrician.
I say that often because it matters.
──────────────────────────────────────────────────
Step 8: How Do I Attach the Grille and Test the Fan?
Once the housing, duct, and wiring are complete, I install the fan motor if it was removed.
Then I attach the grille.
Most grilles use spring clips.
I squeeze the clips, insert them into the slots, and push the grille up until it sits tight against the ceiling.
Then I restore power.
I turn on the fan.
I listen first.
The fan should sound smooth.
Not rattly.
Not rough.
Not strained.
Then I check airflow.
A simple tissue test helps. I hold a tissue near the grille. The fan should pull it toward the grille.
This is not a professional airflow measurement.
But it is a useful quick check.
If the fan runs but does not pull air well, I check the duct, damper, and exterior cap.
──────────────────────────────────────────────────
How Long Should I Run the Bathroom Exhaust Fan?
I recommend running the fan during the shower.
Then keep it running after the shower.
For many bathrooms, 15 to 30 minutes after bathing is a good range.
This helps remove lingering humidity.
A timer switch is useful.
A humidity-sensing fan is also useful.
I like these controls because they make ventilation automatic. People forget to turn fans on. People also turn them off too soon.
A timer or humidity sensor helps solve that problem.
──────────────────────────────────────────────────
What Are the Most Common Bathroom Fan Installation Mistakes?
I see these mistakes often.
They are avoidable.
- Venting into the attic
- Using a fan that is too small
- Choosing a fan that is too noisy
- Using a long duct with too many bends
- Leaving duct joints unsealed
- Letting flexible duct sag
- Blocking the exterior vent cap
- Forgetting the backdraft damper
- Mounting the housing loosely
- Guessing on wiring
- Not testing airflow
The biggest mistake is venting indoors.
That can move moisture into hidden spaces.
I do not want moisture in insulation.
I do not want moisture on roof sheathing.
I do not want moisture in wall cavities.
Bathroom exhaust should leave the building.
That is the point.

Can I Replace an Old Bathroom Fan Myself?
Yes, sometimes.
If the new fan fits the same opening and uses the same duct path, replacement may be straightforward.
But I still inspect the whole system.
I check:
- Fan housing
- Duct connection
- Duct condition
- Exterior termination
- Damper
- Wiring
- Ceiling support
Sometimes the old fan is not the real problem.
The duct may be crushed.
The vent cap may be blocked.
The fan may be exhausting into the attic.
If I replace only the fan and ignore those problems, the bathroom may still stay damp.
A bathroom exhaust fan is a system, not just a grille on the ceiling.
──────────────────────────────────────────────────
When Should I Call a Professional?
I recommend calling a professional when the job includes risk or uncertainty.
Call a licensed electrician or contractor if:
- New wiring is needed
- The wiring is old or confusing
- A roof vent must be installed
- You see mold or water damage
- The duct route is difficult
- The fan has a heater
- A dedicated circuit may be needed
- Local code requirements are unclear
- You are not comfortable working overhead
DIY work can be satisfying.
But safety comes first.
A professional can help prevent electrical hazards, roof leaks, and poor ventilation performance.
──────────────────────────────────────────────────
More Related Questions
What Size Exhaust Fan Do I Need for My Bathroom?
I usually start with 1 CFM per square foot of bathroom floor area.
A 50-square-foot bathroom usually needs at least 50 CFM.
A 100-square-foot bathroom usually needs at least 100 CFM.
Larger or more complex bathrooms may need more.
Can a Bathroom Fan Be Too Powerful?
Yes.
A fan can be larger than needed.
An oversized fan may be louder. It may also remove conditioned indoor air faster than necessary.
I want enough airflow to control moisture.
Not random overkill.
Should a Bathroom Fan Vent Through the Roof or Wall?
Either can work.
I choose the shortest practical path to the outdoors.
A nearby exterior wall is often simple.
Interior bathrooms may need roof venting.
The best option depends on the home layout.
Is Flexible Duct Okay for a Bathroom Fan?
Flexible duct can be acceptable when installed correctly.
But I prefer smooth metal duct when possible.
If using flexible duct, I keep it:
- Short
- Straight
- Supported
- Fully extended
- Free from sags
Why Is My Bathroom Fan Loud?
Noise can come from the fan motor, loose housing, restrictive ductwork, sharp bends, or a high sone rating.
A quiet fan with a clean duct path usually performs better.
It is also more pleasant to use.
──────────────────────────────────────────────────
Conclusion
Installing a bathroom exhaust fan is about moisture control, safe wiring, proper ducting, and outdoor ventilation. I always focus on the fan size, location, duct route, and electrical safety. If the work involves complex wiring or roof cutting, I bring in a professional. A good fan only works when installed correctly.